Create Connection
Learn how to set up database connection information and create a connection.
Add Connection
Add a new database connection to the project.
Click Add Connection Button
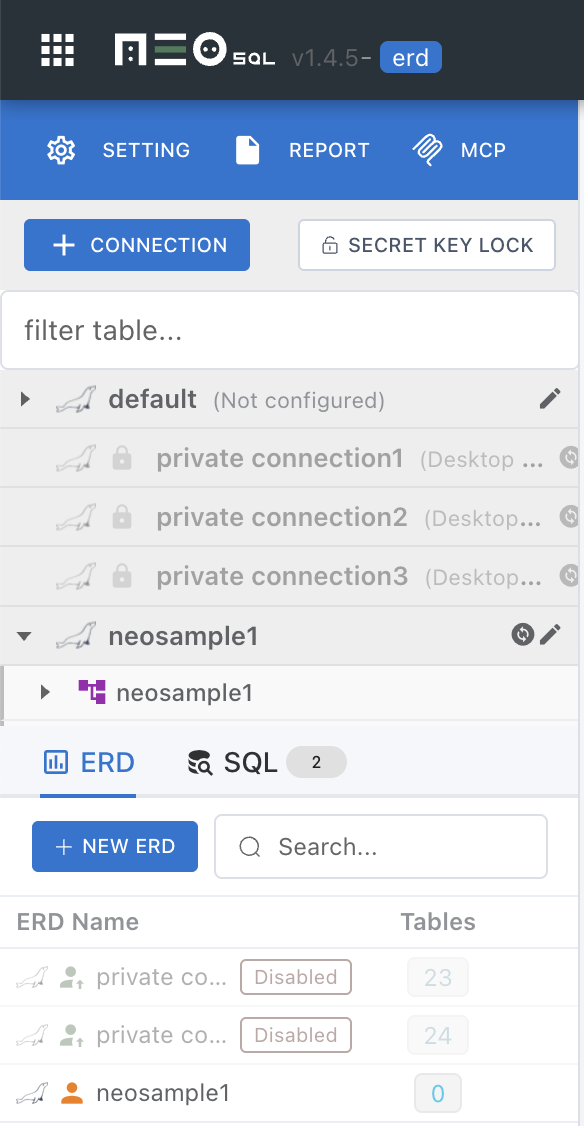
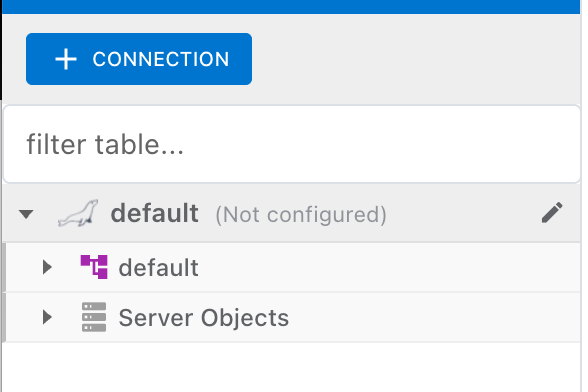
Click the "+" button in the connection list on the left panel.
Select DBMS
Select the database type to connect. Supports MariaDB, MySQL, Oracle, PostgreSQL, SQL Server, SQLite, and H2.
Enter Connection Info
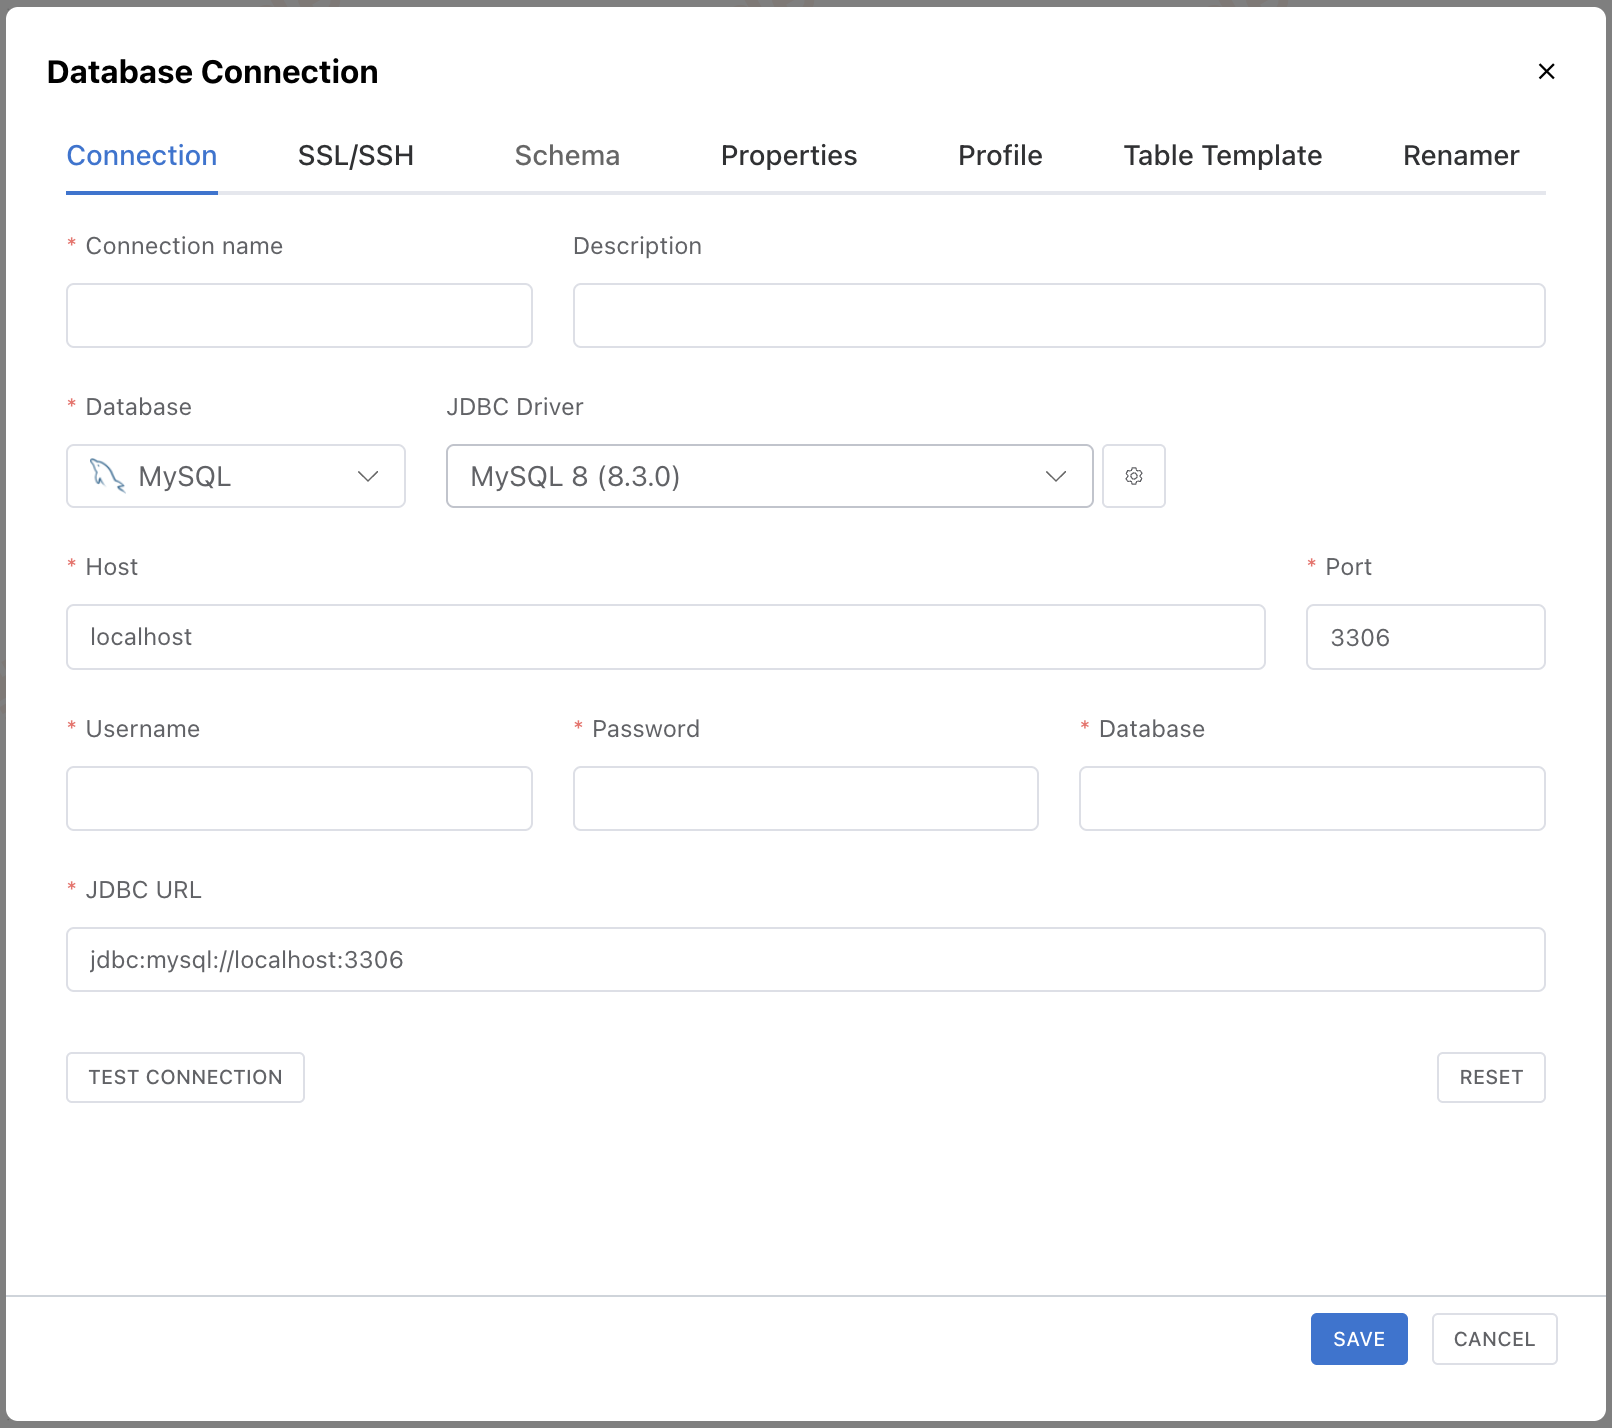
Connection Fields
| Field | Description | Example |
|---|---|---|
| Connection name | Display name for identification | DevDB, ProductionDB |
| Host | Database server address | localhost, 192.168.1.100 |
| Port | Database service port | 3306 (MySQL), 5432 (PostgreSQL) |
| Database | Database (schema) name to connect | myapp_dev |
| Username | Database access account | root, admin |
| Password | Password for the access account | - |
Enter the host, port, database name, username, and password.
When you enter a full JDBC URL into the URL field, information such as Host, Port, and Database is parsed and automatically mapped to each input field.
The query parameters in the URL are automatically mapped to either the SSL settings in the SSL/SSH tab or the Properties tab, depending on the parameter key type.
useSSL, sslMode, requireSsl, etc.)→ Mapped to the SSL settings in the SSL/SSH tab.
Other parameters (useUnicode, characterEncoding, serverTimezone, etc.)→ Added as key-value entries in the Properties tab.
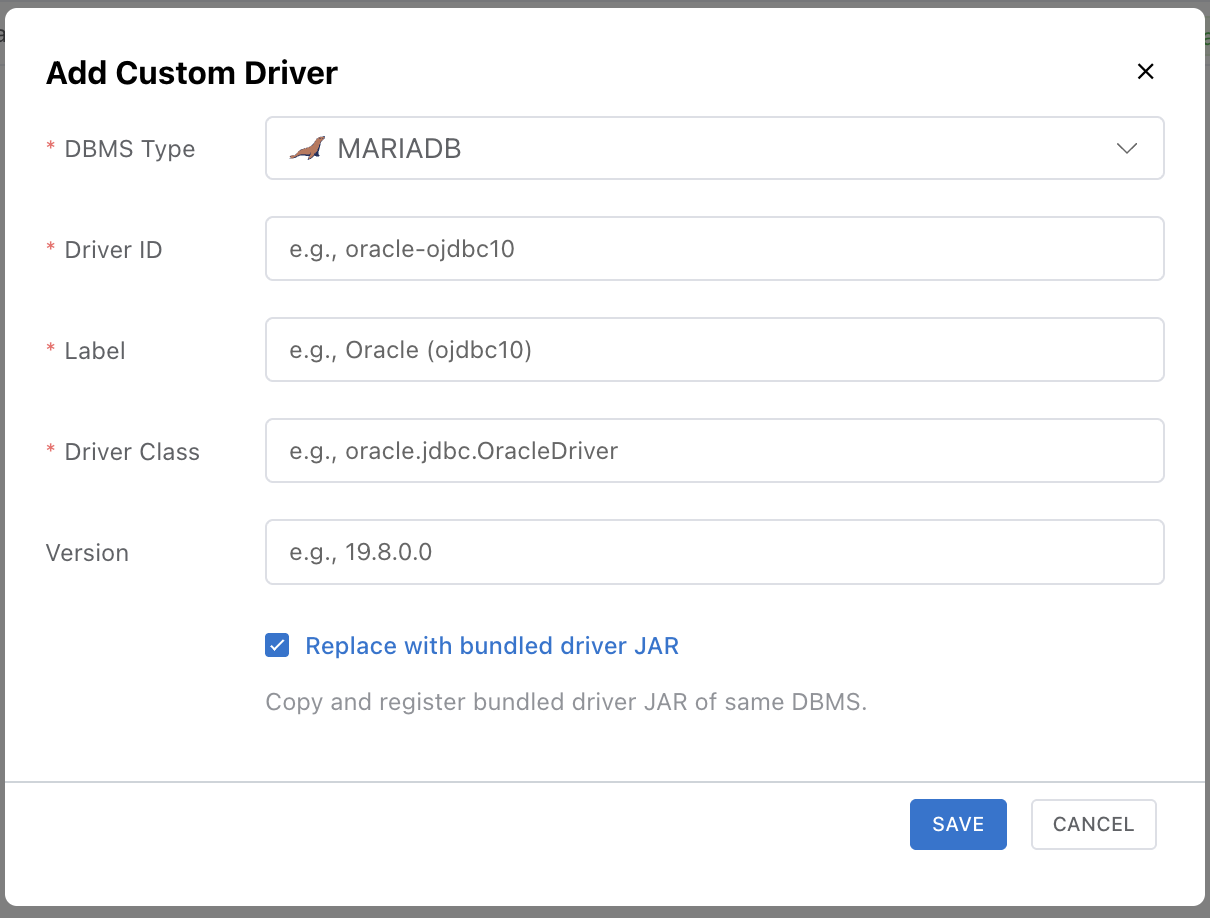
Register a Custom JDBC Driver
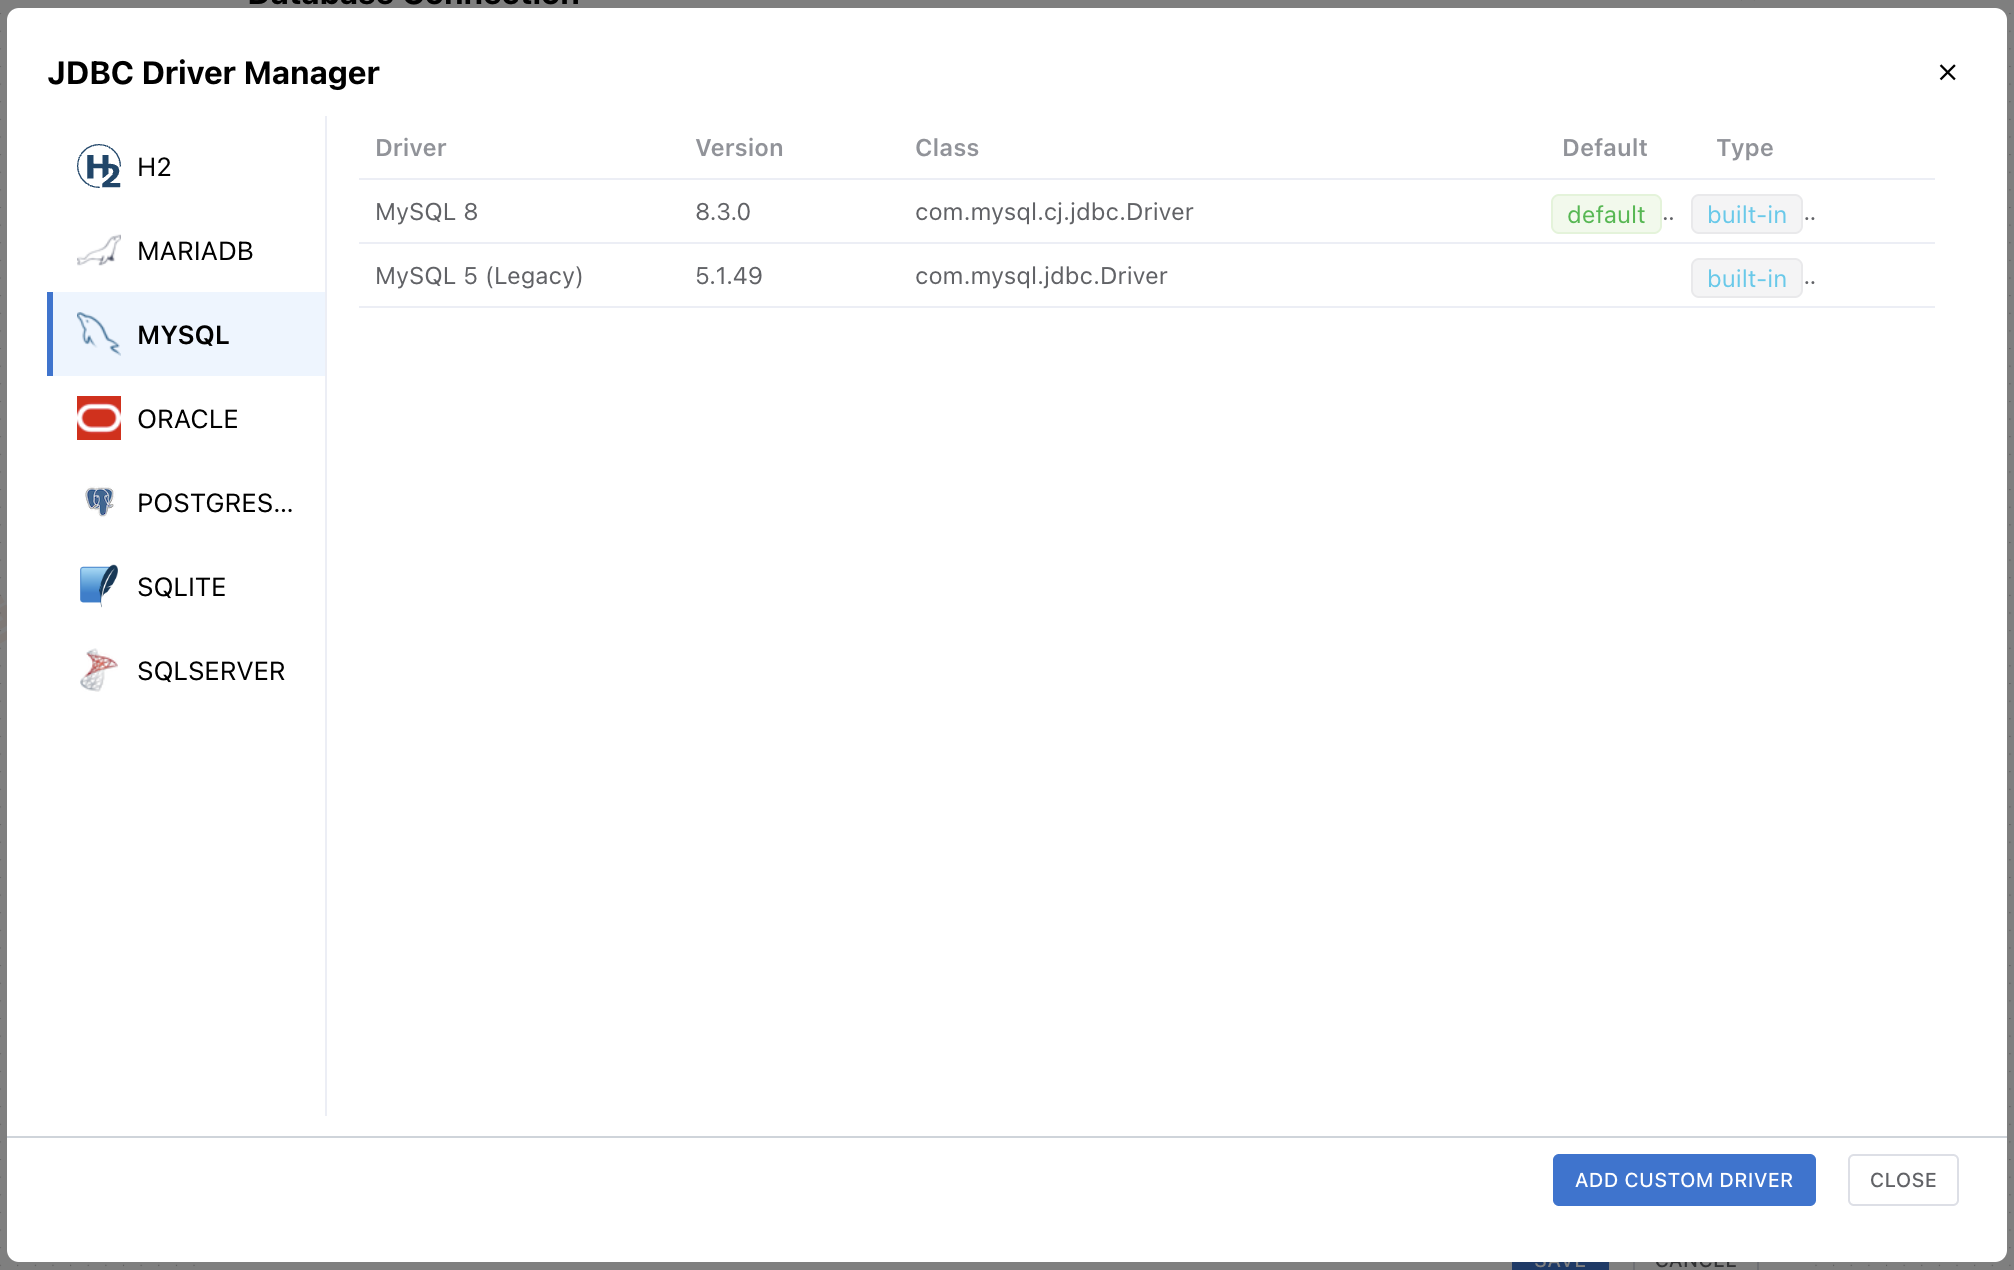
Click the settings (gear) button next to the JDBC Driver field to open the JDBC Driver Manager. You can review the built-in drivers bundled with NeoSQL, or click Add Custom Driver to upload your own .jar file and register a custom driver.

| Field | Description | Example |
|---|---|---|
| DBMS Type | Target database type | - |
| Driver ID | Unique driver identifier | oracle-ojdbc10 |
| Label | Display name shown in the driver list | Oracle (ojdbc10) |
| Driver Class | JDBC Driver class | oracle.jdbc.OracleDriver |
| Version | Driver version | 19.8.0.0 |
| JAR Files | Driver .jar files | - |
Note: Registering a custom driver is available only in the Desktop mode. The Web App can only use the built-in drivers bundled with NeoSQL.
Auto-Install Prompt for Missing Custom Drivers
When you import a project backup, sync a teammate's connection, or move to a new PC, a connection may reference a custom driver that isn't installed locally. In that case NeoSQL automatically opens a driver installation modal as the project loads, with the missing driver's metadata (Driver ID, Class, Version, etc.) pre-populated — you can usually just save it as is.
Enabling the Replace bundled option in that modal reuses the JAR files already bundled with NeoSQL instead of asking for a .jar upload, giving you a quick way to recover a connection brought in from backup or team sync.
Delete a Driver
Remove a registered custom driver by clicking the red trash-can icon at the end of its row in the JDBC Driver Manager.
Test & Save Connection
Click the "Test Connection" button to verify, then click "Save".
Note: If the connection test fails, check the host address, port, firewall settings, and database access permissions.
Connection Properties
Specify additional properties for the JDBC connection in key-value format. Configure in the Properties tab of the connection settings.
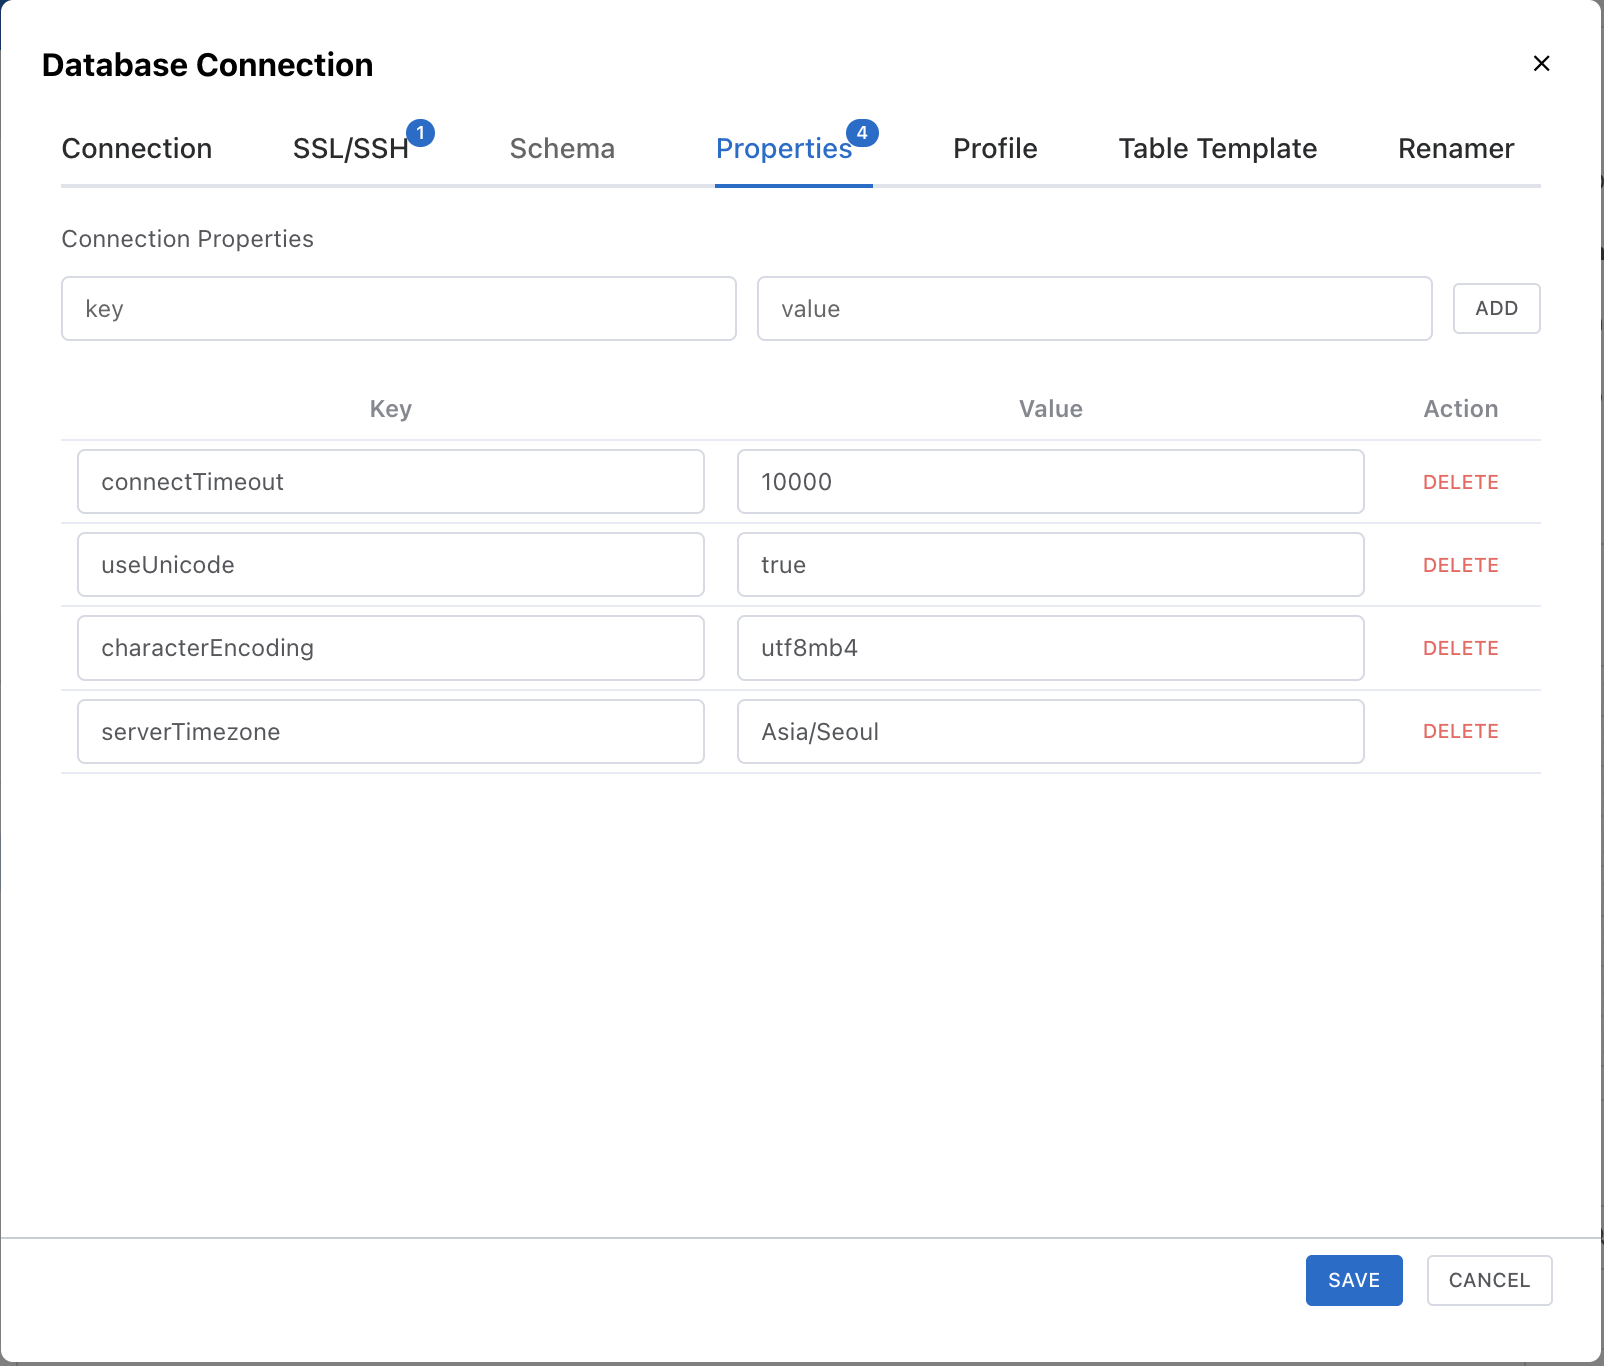
Enter a key and value in the input fields, then click the ADD button to add a property. Added properties are shown in the list below and can be individually deleted.
Usage Examples
| key | value | Description |
|---|---|---|
connectTimeout | 10000 | Connection timeout (milliseconds) |
useUnicode | true | Enable Unicode support |
characterEncoding | utf8mb4 | Character encoding setting |
serverTimezone | Asia/Seoul | Server timezone setting |
Note: Default connection properties for each DBMS are automatically applied. Properties specified here override the defaults. Refer to each JDBC driver's documentation for available properties.
Public Connection vs Private Connection
NeoSQL automatically classifies connections into **Public** connections that can be shared with your team and **Private** connections for personal use, based on the connection information you provide.
Automatic Private Detection Rules
A connection is automatically marked Private when any of the following holds:
- SQLite — driver is
org.sqlite.JDBCor URL starts withjdbc:sqlite: - H2 Embedded — URL starts with
jdbc:h2:but NOTjdbc:h2:tcp:orjdbc:h2:ssl:(file / in-memory modes) - Localhost — host is one of
localhost,127.0.0.1,::1,0.0.0.0
Note: Corporate private ranges (10.x, 172.16–31.x, 192.168.x) and host.docker.internal are excluded from automatic Private detection.
Switching Public ↔ Private
When edits change a connection's classification, NeoSQL behaves as follows:
- Public → Private — if any team ERDs reference this connection, a confirmation modal lists them and, on approval, converts them to personal ERDs. Other teammates see the ERDs disappear via sync.
- Private → Public — personal ERDs are not automatically restored to team ERDs. This is a safeguard against accidentally sharing personal notes or tests.
Private connections are not available in the Web App
Private connections cannot be created or used in Web mode. When creating a connection in Web mode, the Host cannot be set to localhost, and SQLite / H2 Embedded cannot be selected in the DBMS picker.
Private connections that were already created in Desktop mode appear in the sidebar with a lock icon and a disabled state.