Collaboration · Sharing
Learn how to invite team members, configure roles and permissions, and share ERDs in real time.
Project & Workspace Concepts
Project is the basic unit of collaboration in NeoSQL. A single project contains multiple ERDs, DB connections, and table definitions.
In online mode, creating a project automatically creates a workspace (sync space). Team members in the same project share the same workspace, and changes are synchronized in real time.
Personal ERD
An ERD visible only to you. It is not exposed to team members.
Team ERD
An ERD shared in real time by all project members. Changes are automatically synced bidirectionally.
In offline mode, project data is stored in the local .neosql/ directory and can be shared with team members via Git.
Create Team & Invite Members
Invite team members to collaborate on a project. Invitations are only available in online mode.
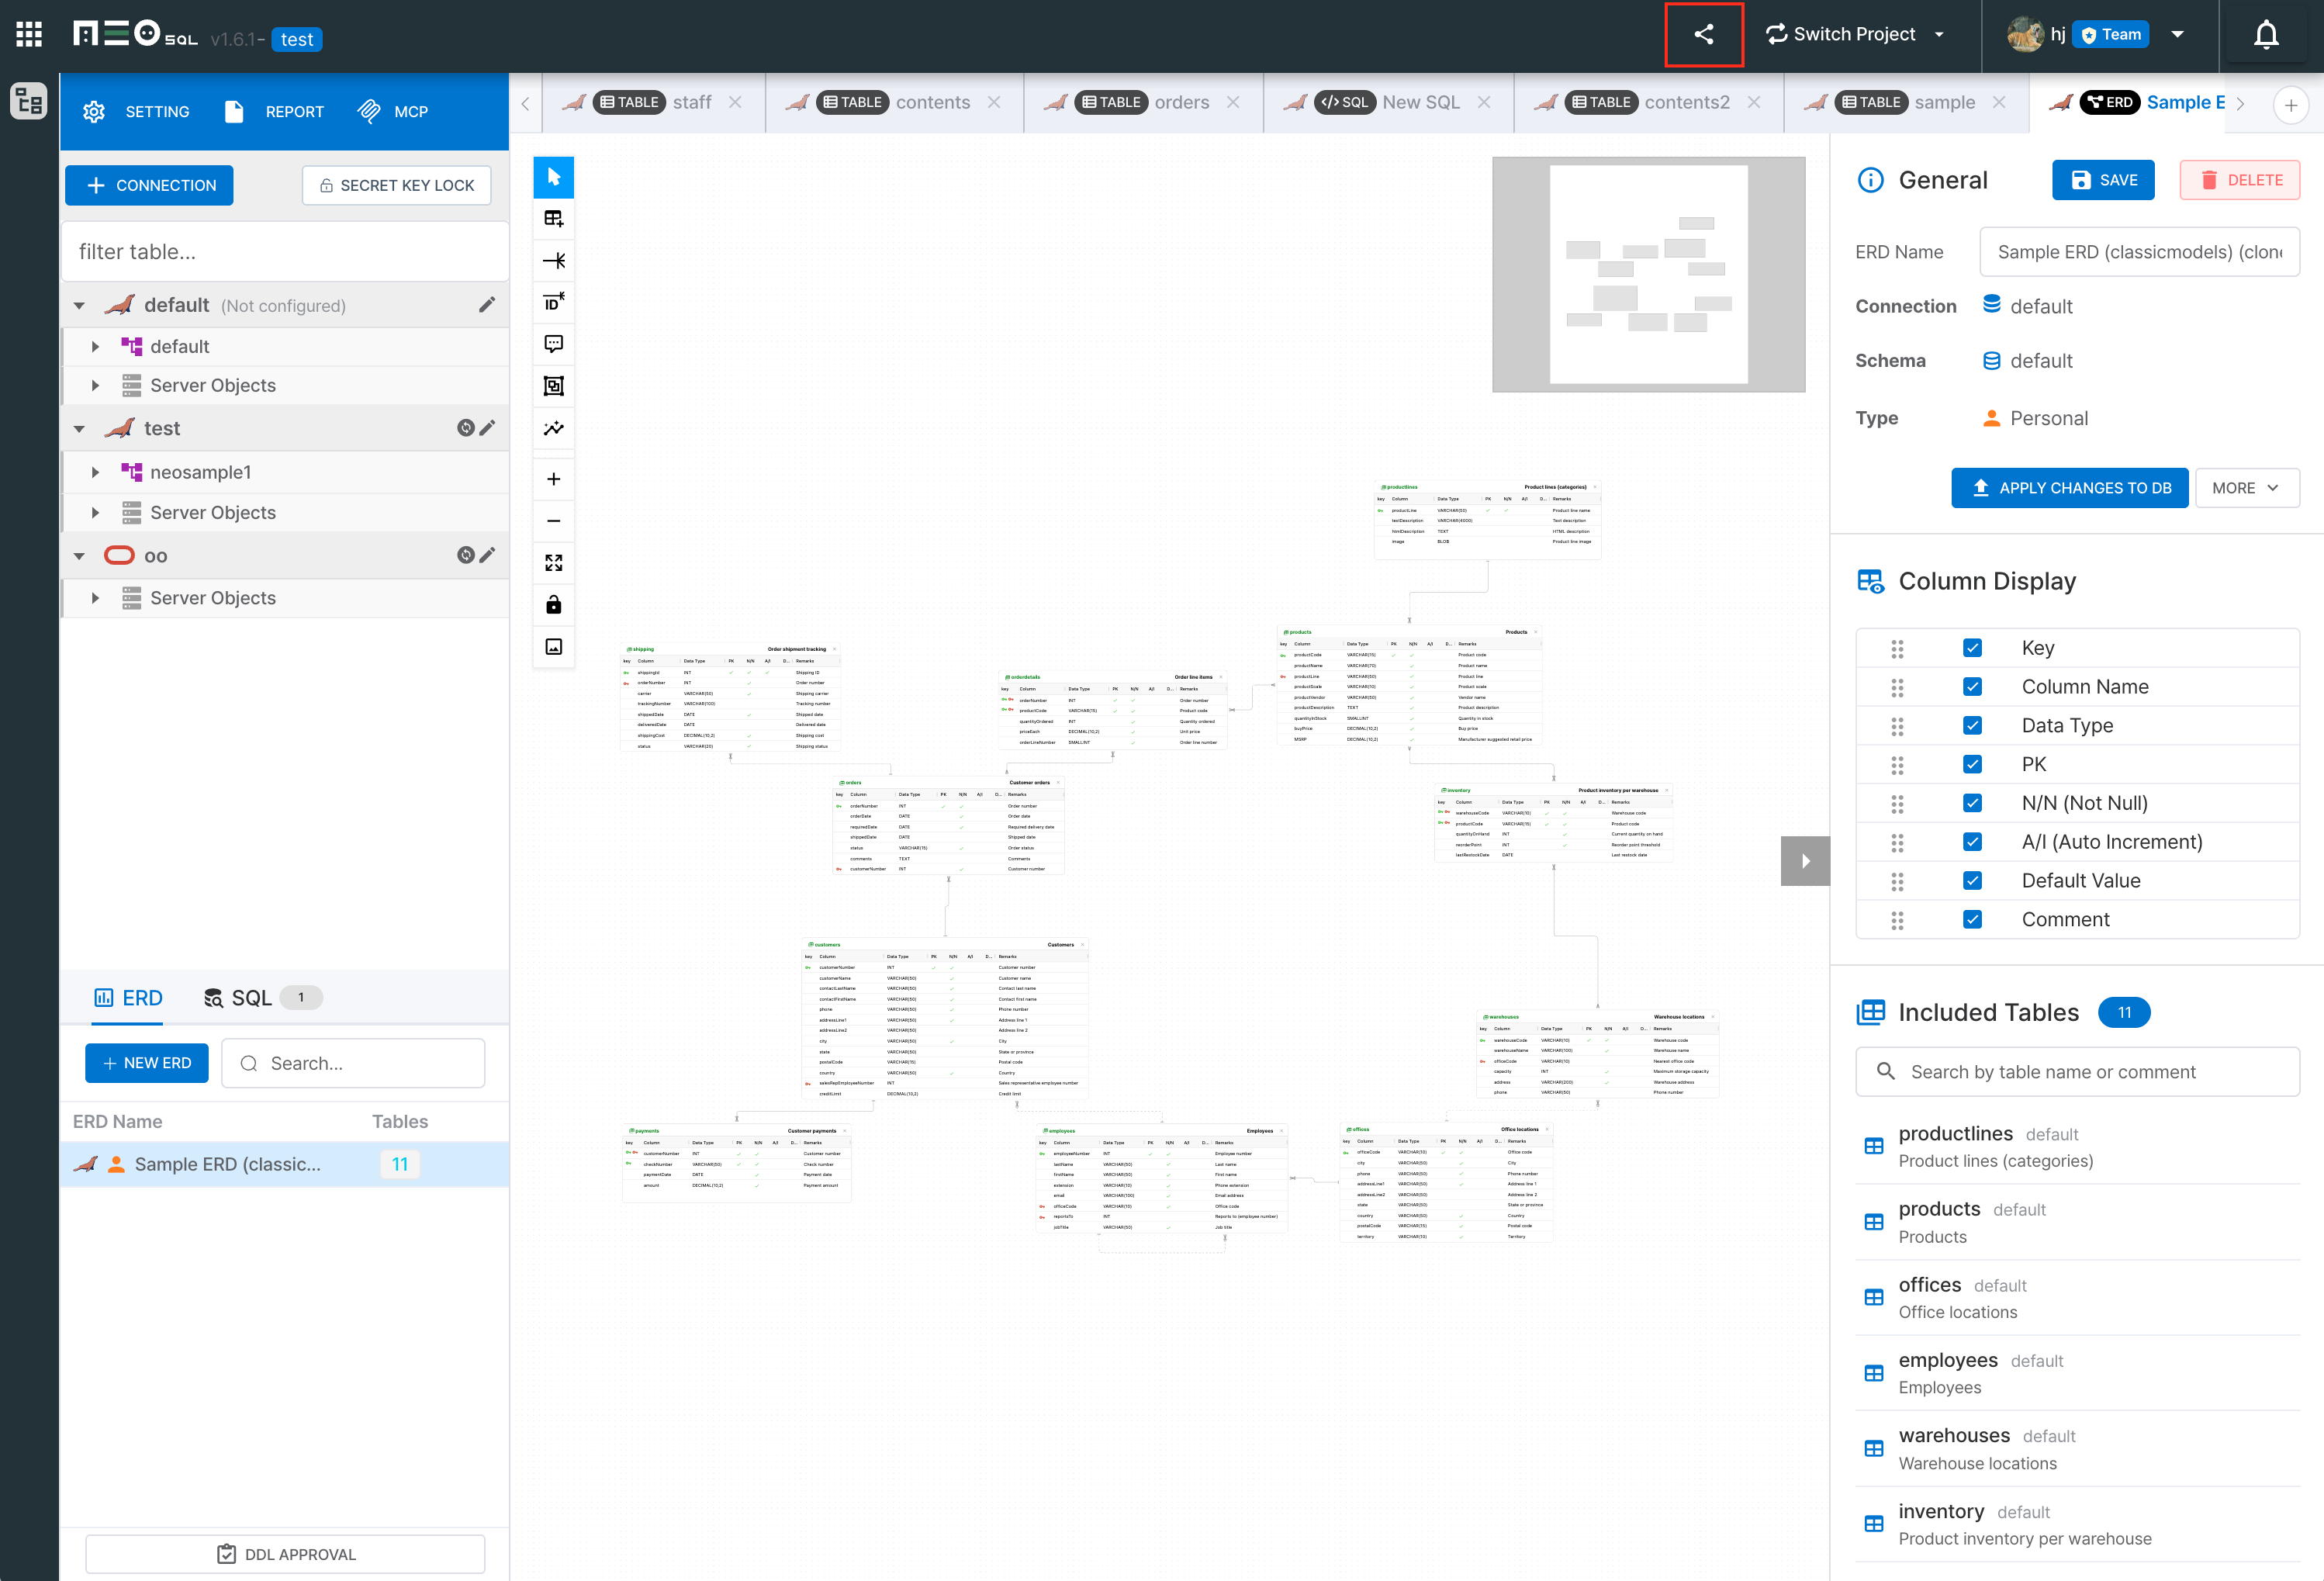
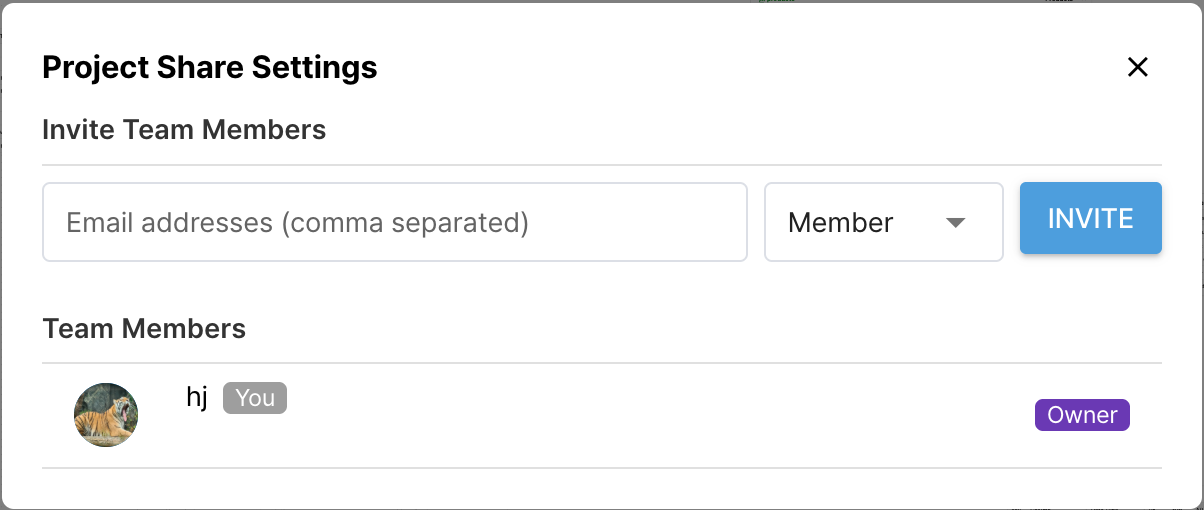
Open Share Modal
Click the Share button in the top toolbar of the project editor to open the project share modal.
Invite Multiple via Email
Enter Emails
Enter the email addresses of team members to invite. Separate multiple addresses with commas (,).
Select Role
Choose the role to assign (Manager, DBA, Member).
Send Invitation
Click the "Invite" button to send invitation emails.
Roles & Permissions
Project members can be assigned one of 4 roles. Each role has different team management permissions.
| Role | Invite Members | Change Role | Remove Member | Transfer Ownership |
|---|---|---|---|---|
| Owner | Manager, DBA, Member | All members | All members | Yes |
| Manager | DBA, Member | DBA, Member | DBA, Member | No |
| DBA | No | No | No | No |
| Member | No | No | No | No |
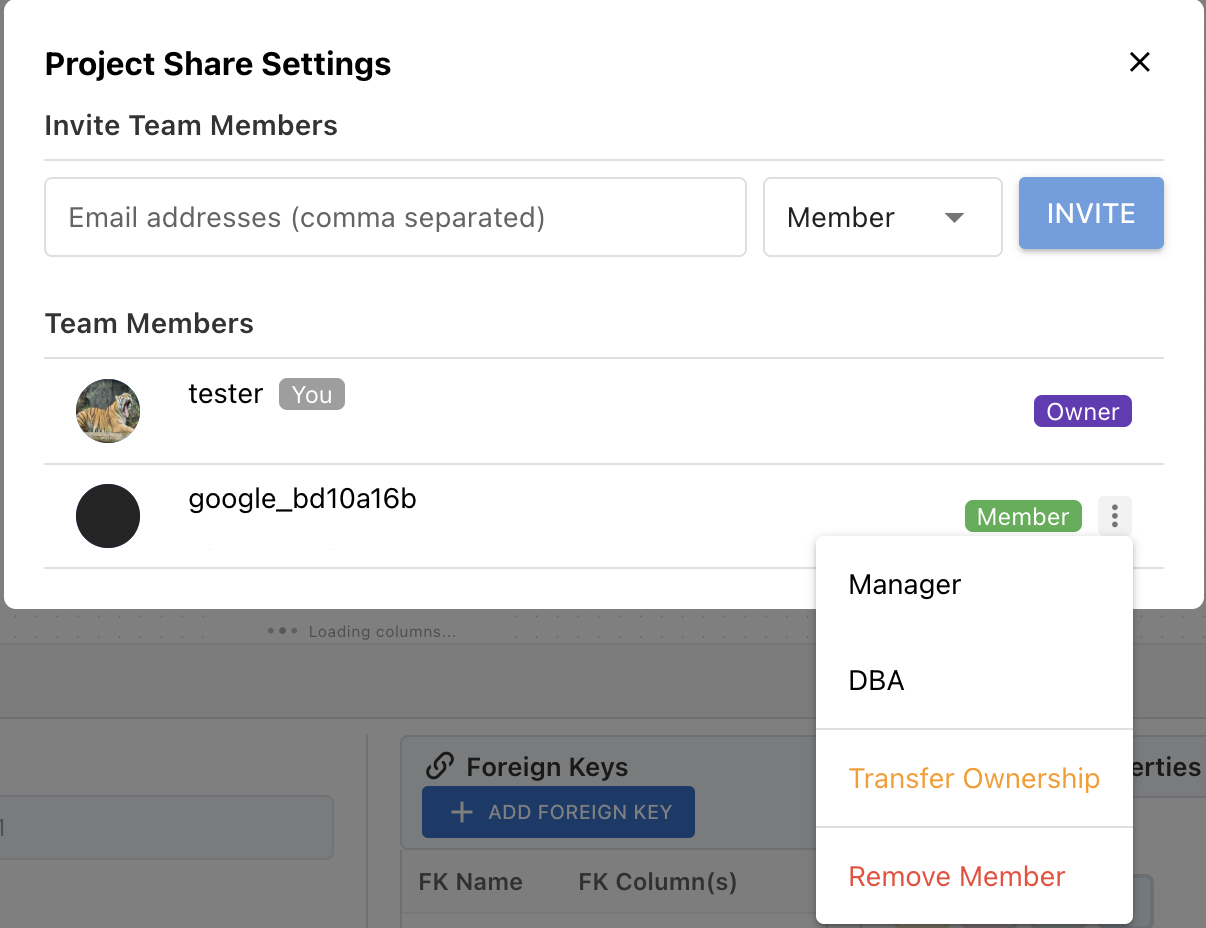
Transfer Ownership
The Owner can transfer ownership to another member from the member list in the share modal. After transfer, the previous Owner becomes a Manager.
Leave Project
Non-Owner members can leave the project by clicking the "Leave Project" button at the bottom of the share modal.

Role Permission Settings
The Owner can assign granular permissions to each role (Manager, DBA, Member) in Setting → Role Permissions.
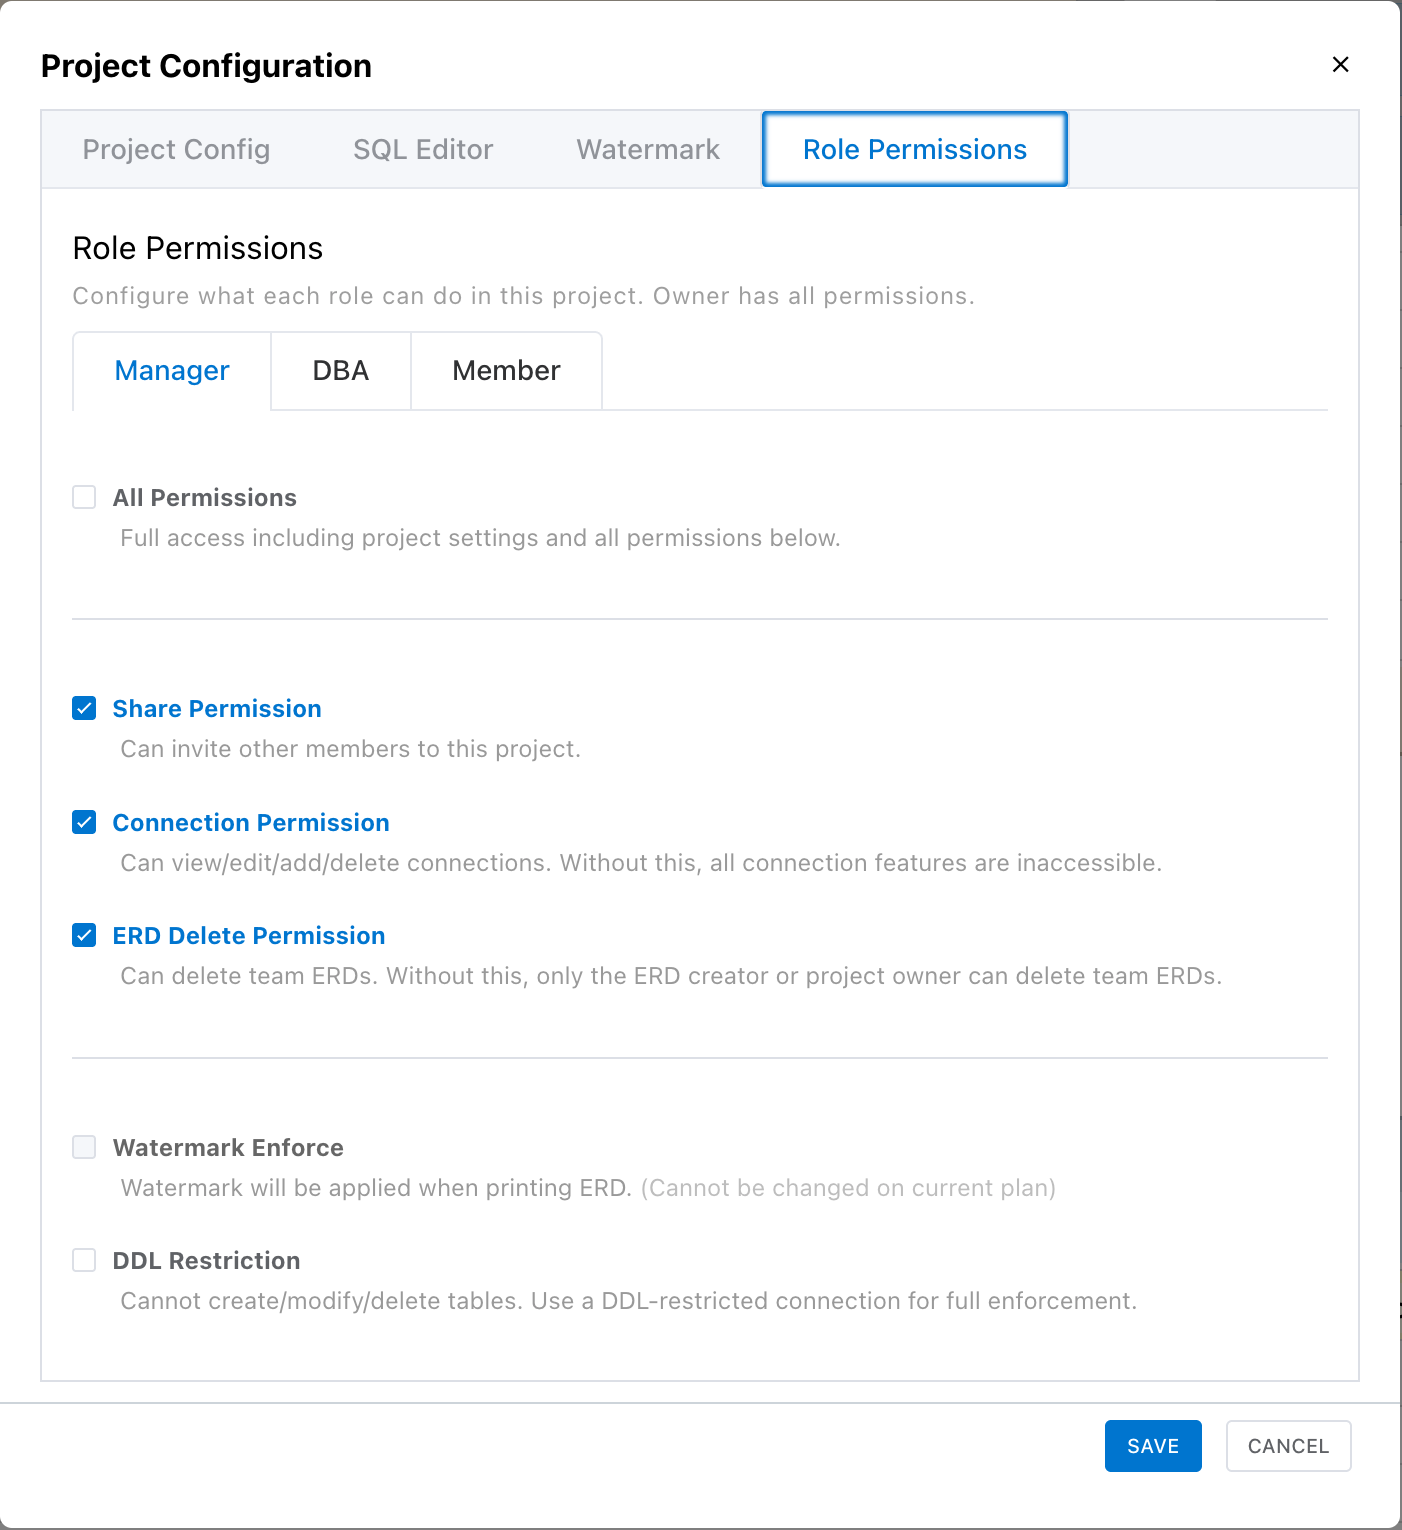
| Permission | Description |
|---|---|
| All Permissions | Grants all permissions equivalent to the Owner. When enabled, all individual permissions below are automatically activated. |
| Share Permission | Can invite team members to the project. |
| Connection Permission | Can view, add, edit, and delete DB connections. Without this permission, all Connection settings features are inaccessible. |
| ERD Delete Permission | Can delete team ERDs. Without this permission, only the project Owner can delete team ERDs. |
| Watermark Enforce | Watermark is forcefully applied when printing ERDs. |
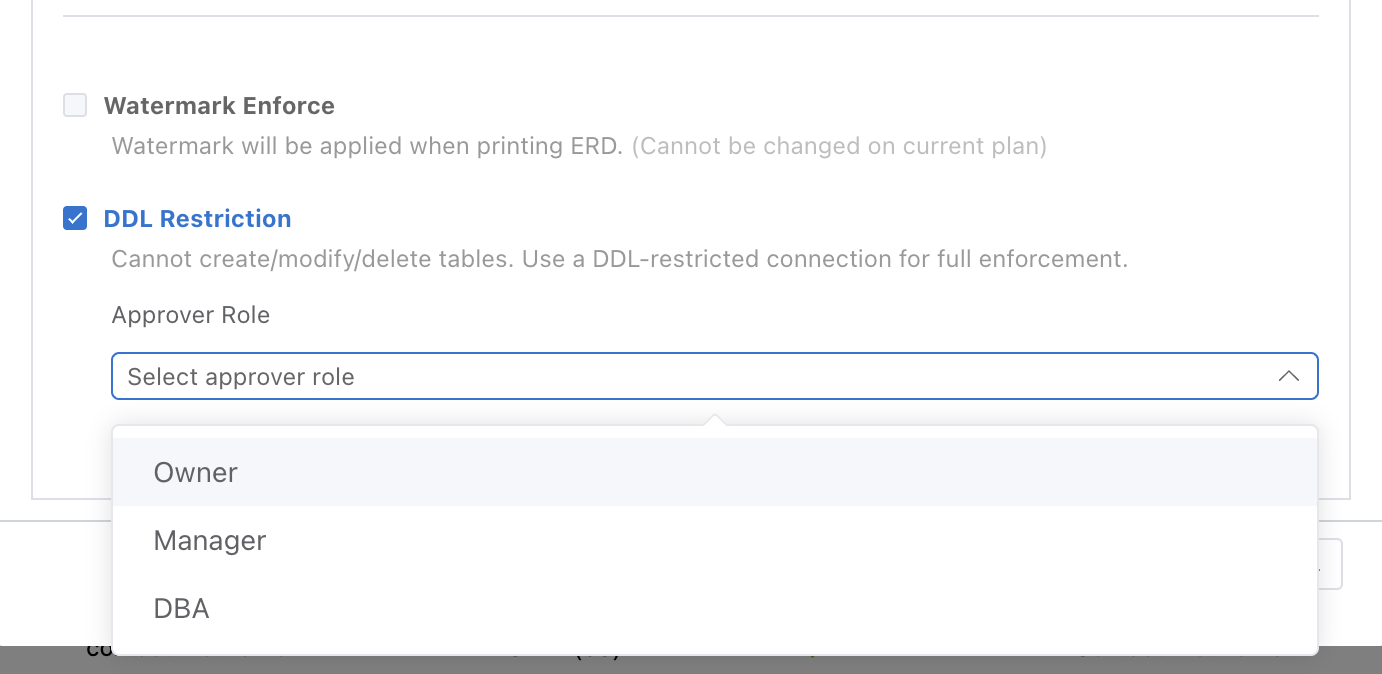
| DDL Restriction | Cannot create, edit, or delete tables. Cannot execute DDL directly via Forward Engineering; must submit an approval request instead. |
DDL Approver Role Selection
When DDL Restriction is enabled, a DDL approver role must be designated. Members with the approver role can review and approve DDL change requests.
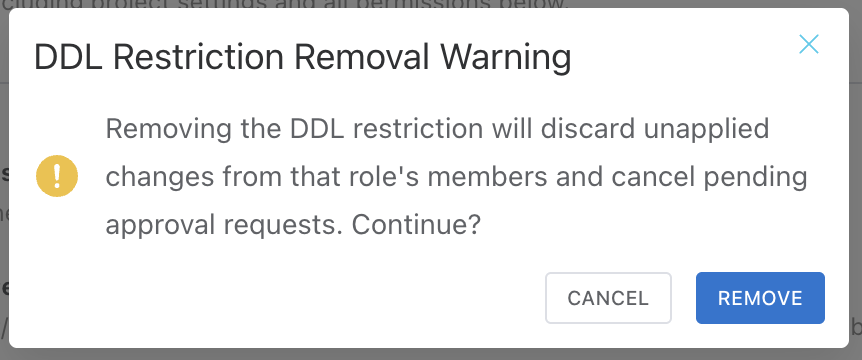
Auto-discard Pending Changes on DDL Restriction Removal
When DDL restriction is removed, pending DDL approval requests from members of that role are automatically discarded. A warning message is displayed before removal.
Note: When DDL Restriction is enabled for a role, Connection Permission is automatically disabled.
Invitation Status & Member Management
The share modal consists of two lists.
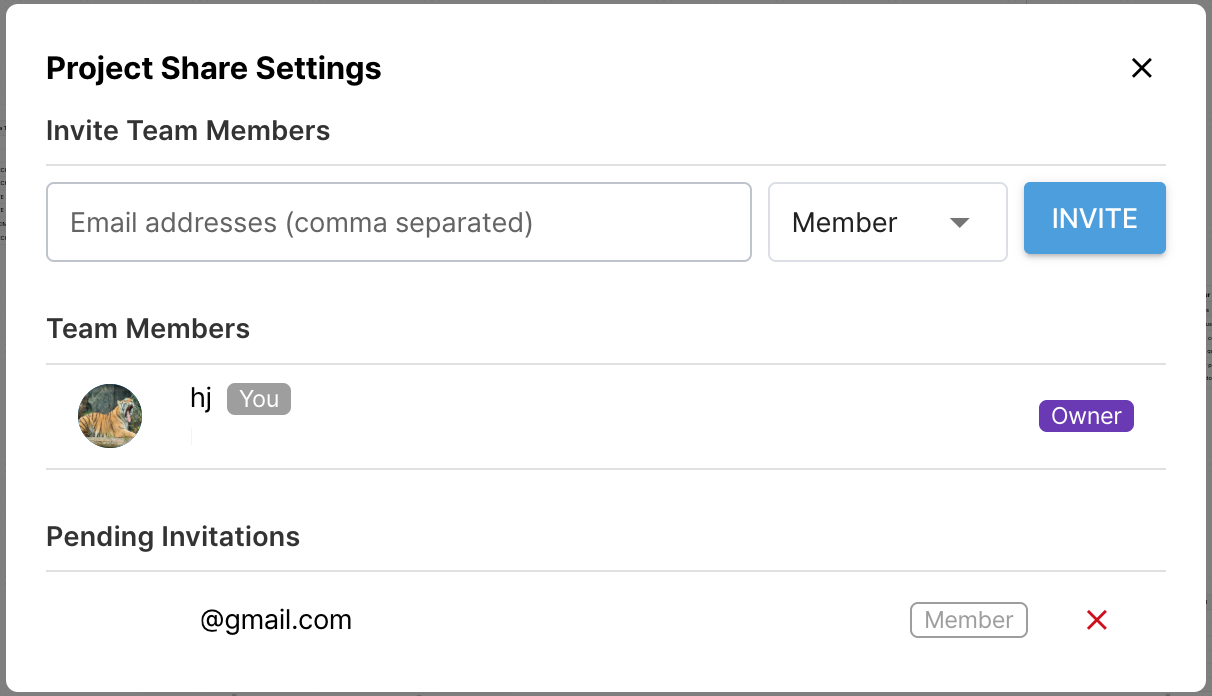
Team Members
Displays members who have accepted the invitation and joined the project.
- View each member's profile, email, and role.
- Owners or Managers can change a member's role or remove them from the project.
Pending Invitations
Shows invitations that have been sent but not yet accepted. Only visible to the Owner.
- When an invitee accepts, they disappear from the pending list and appear in the team members list.
- When the Owner cancels an invitation, it is immediately removed from the pending list.
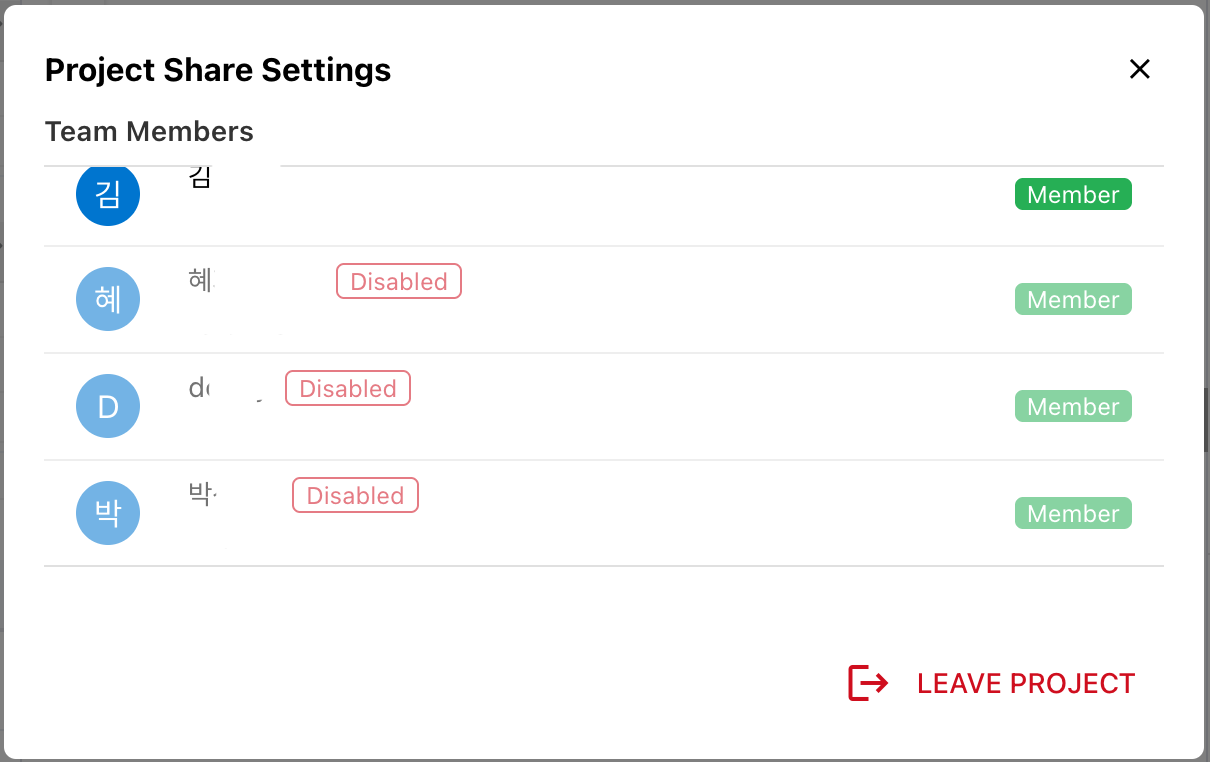
Member Deactivation on Plan Downgrade
If a plan downgrade causes the member count to exceed the allowed limit, a member cleanup modal is shown to the Owner. The Owner must select which members to keep active within the limit. Unselected members become deactivated.
Reactivate Deactivated Members
Deactivated members are shown with a "Disabled" badge in the member list. If there is room within the plan limit, the Owner can click the unlock icon to reactivate them.
Real-time Sync
In online mode, saved changes are automatically synced to team members in real time.
Sync Targets
| Data | Sync Method |
|---|---|
| Table definitions (columns, PK, FK, indexes) | Real-time bidirectional |
| Team ERD diagrams | Real-time bidirectional |
| Entity mapping / naming conversion settings | Real-time bidirectional |
| User preferences (viewport, tabs) | Real-time bidirectional |
| DB connection info / project metadata | Immediate |
| Member / invitation info | Immediate |
Sync Behavior
- Auto sync: Initial sync runs when opening a project, then saved changes are automatically synced bidirectionally.
- Multi-tab support: You can work with multiple tabs open in the same browser.
- Offline change preservation: Data is preserved locally even if the network disconnects. Sync resumes automatically when the network recovers.
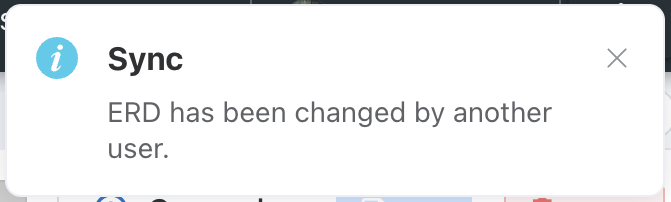
- Conflict handling: When simultaneous edits cause conflicts, the most recent change takes priority.
Personal ERD vs Team ERD
In online mode, ERDs are classified into Personal ERD and Team ERD. Understanding the differences in behavior is important.
Personal ERD vs Team ERD Comparison
| Category | Personal ERD | Team ERD |
|---|---|---|
| Visibility | Visible only to you | Visible to all project members (regardless of join date) |
| Real-time Sync | None (personal only) | Bidirectional real-time sync between members |
| Gallery Sharing | Available (publish / unpublish) | No |
| Delete Permission | Owner can freely delete | Only the project Owner, or members with All Permissions / Team ERD Delete Permission can delete |
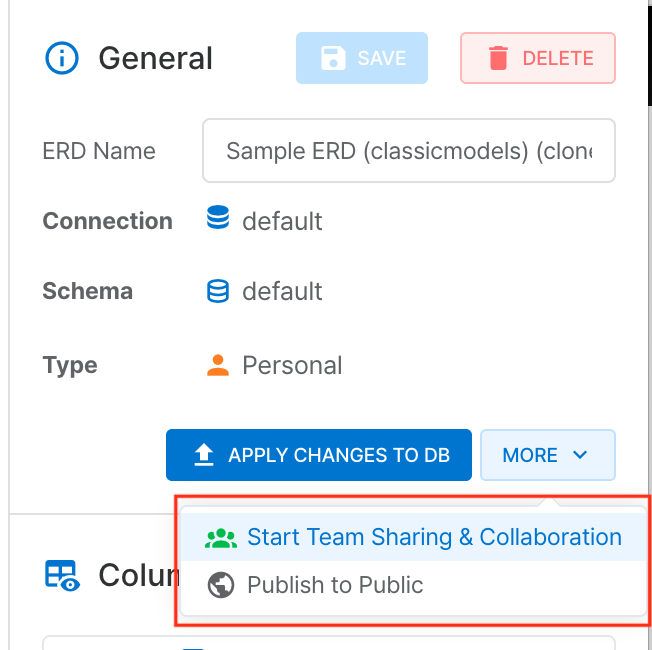
Personal → Team Conversion
Click "More > Start Team Sharing & Collaboration" in the ERD info panel to convert a personal ERD to a team ERD. It is immediately shared with all project members in real time.
Caution: Once converted to a team ERD, it cannot be reverted to a personal ERD. Instead, you can create a copy using "Copy to My ERD".
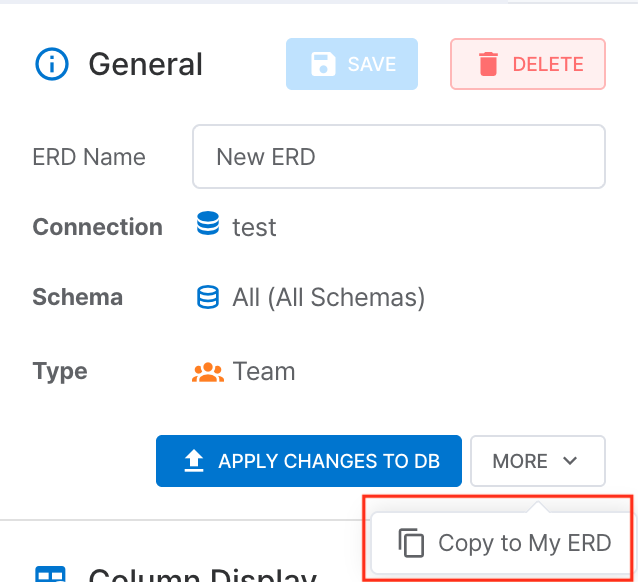
Team → Personal Copy
Click "More > Copy to My ERD" in the ERD info panel to create a copy of the team ERD as a personal ERD. The original team ERD remains unchanged, and the copied personal ERD is managed independently.
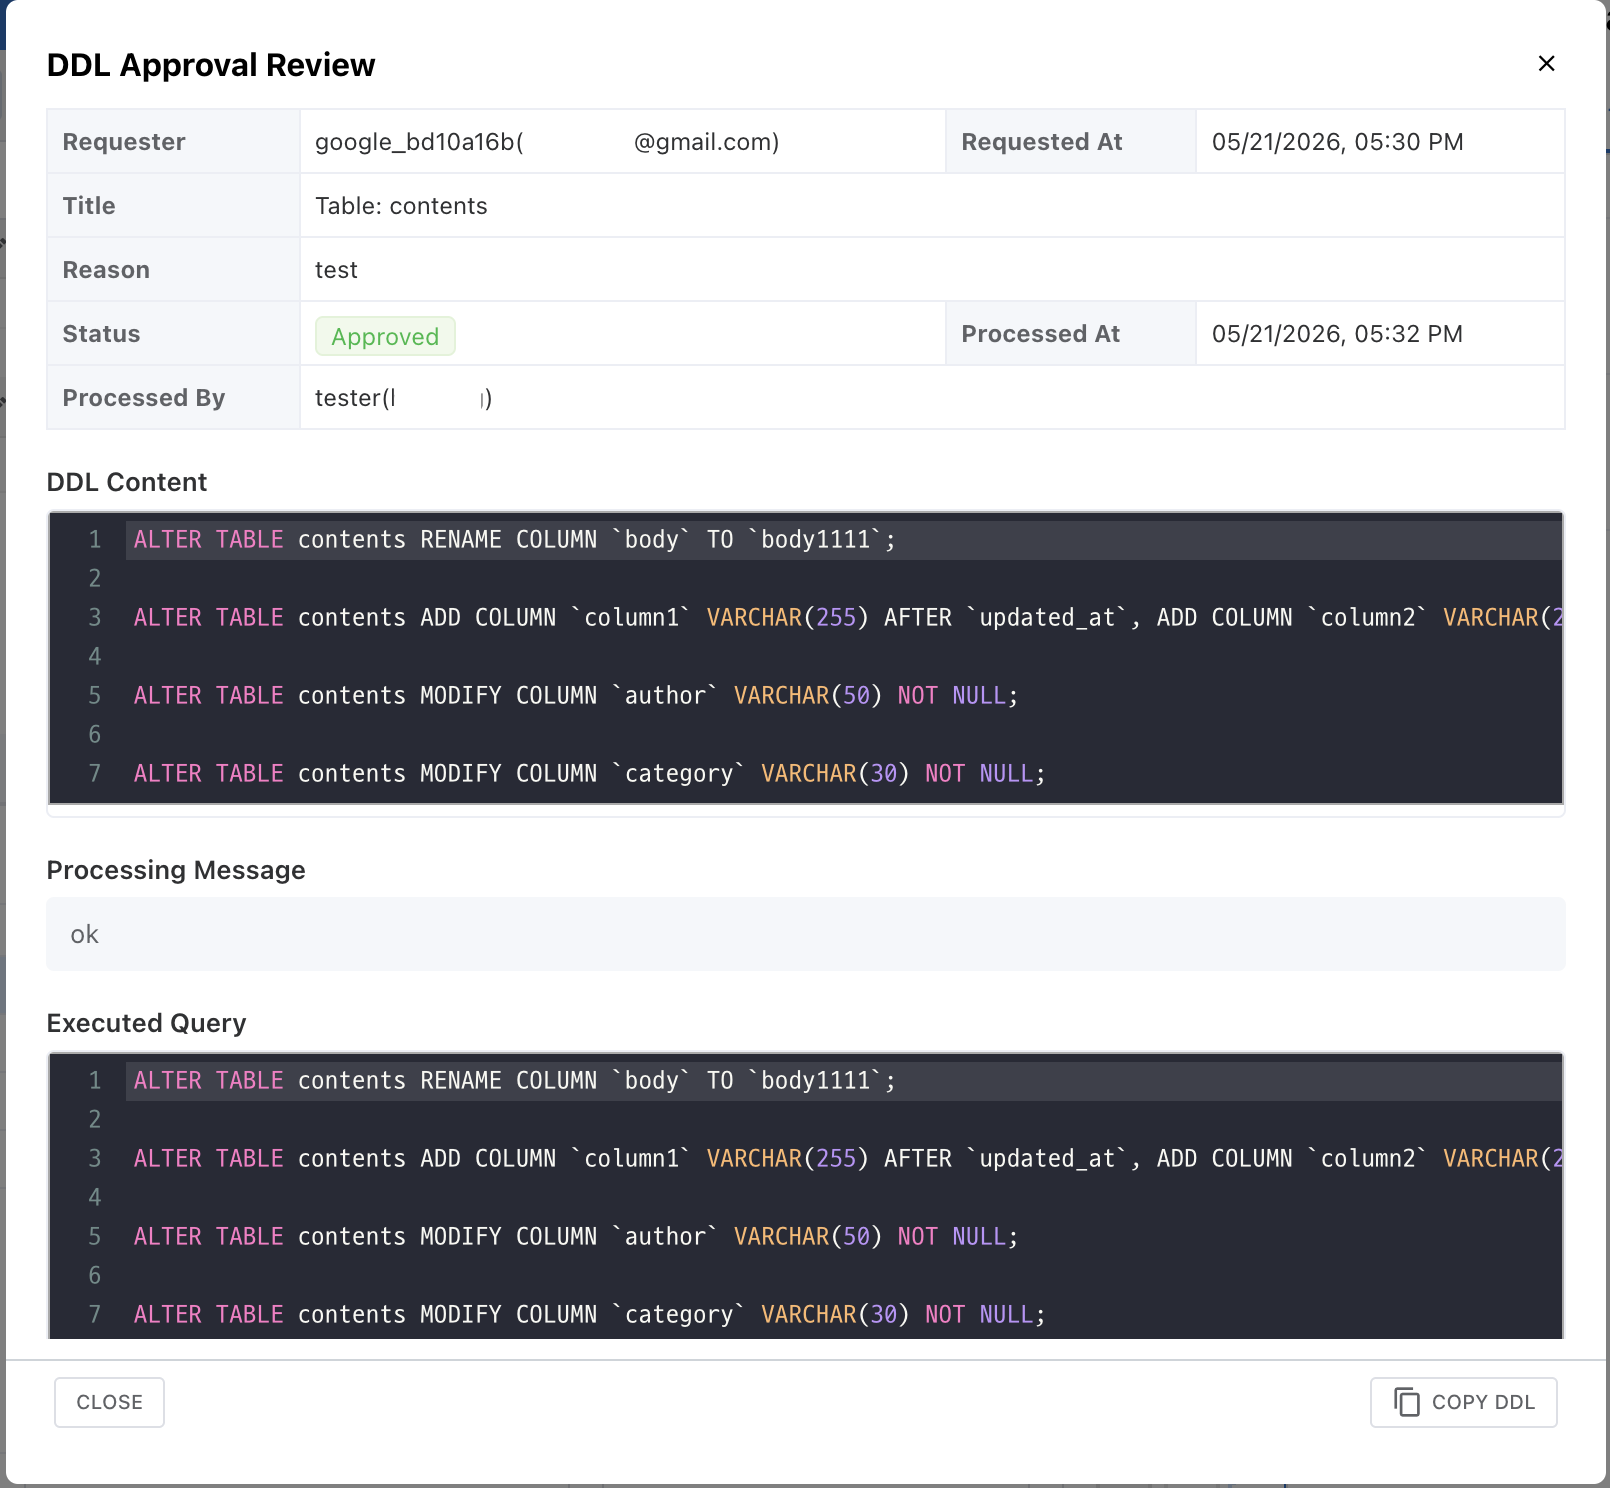
DDL Approval Process
Members whose role has DDL Restriction enabled in project settings must submit an approval request instead of directly executing Forward Engineering (DDL changes).
Create Change Request
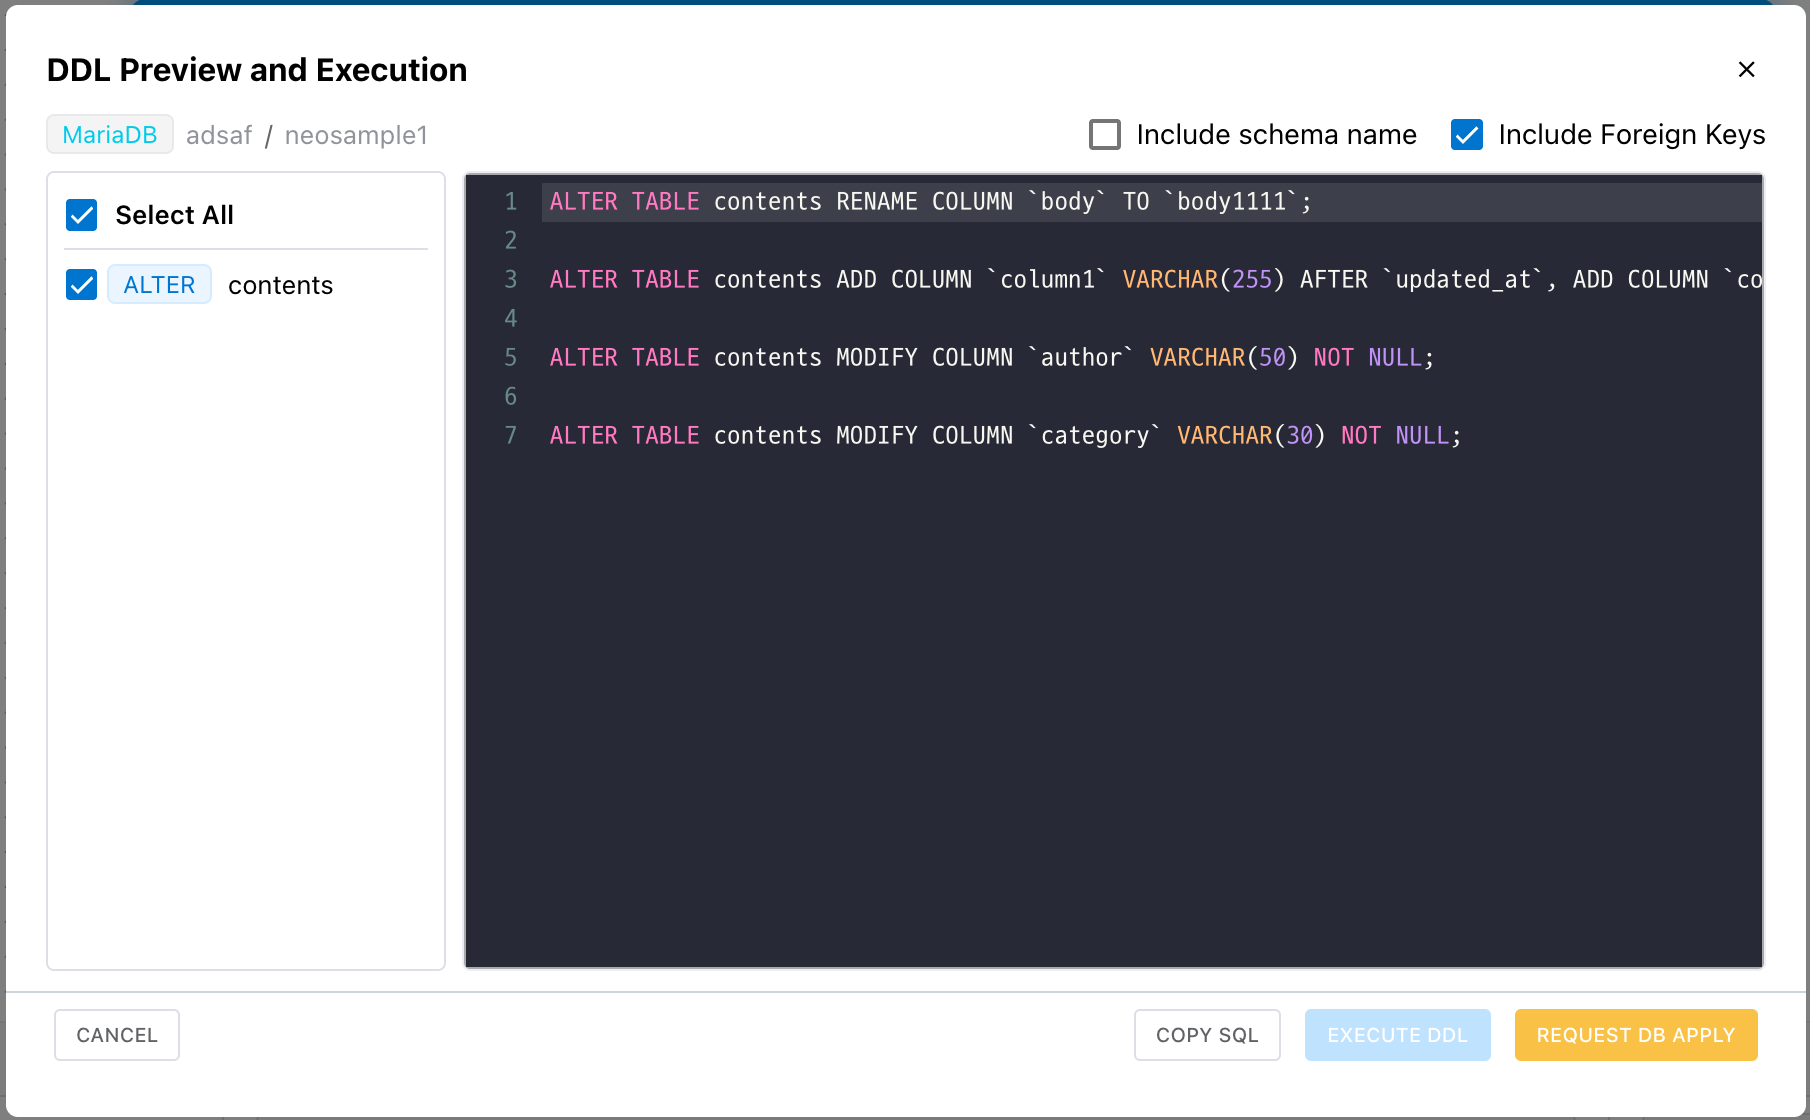
DDL Preview
When Forward Engineering is executed, members with DDL restriction see an approval request modal. They can preview the DDL statements to be generated.
Enter Reason
Write the reason for the change. (Required, max 500 characters)
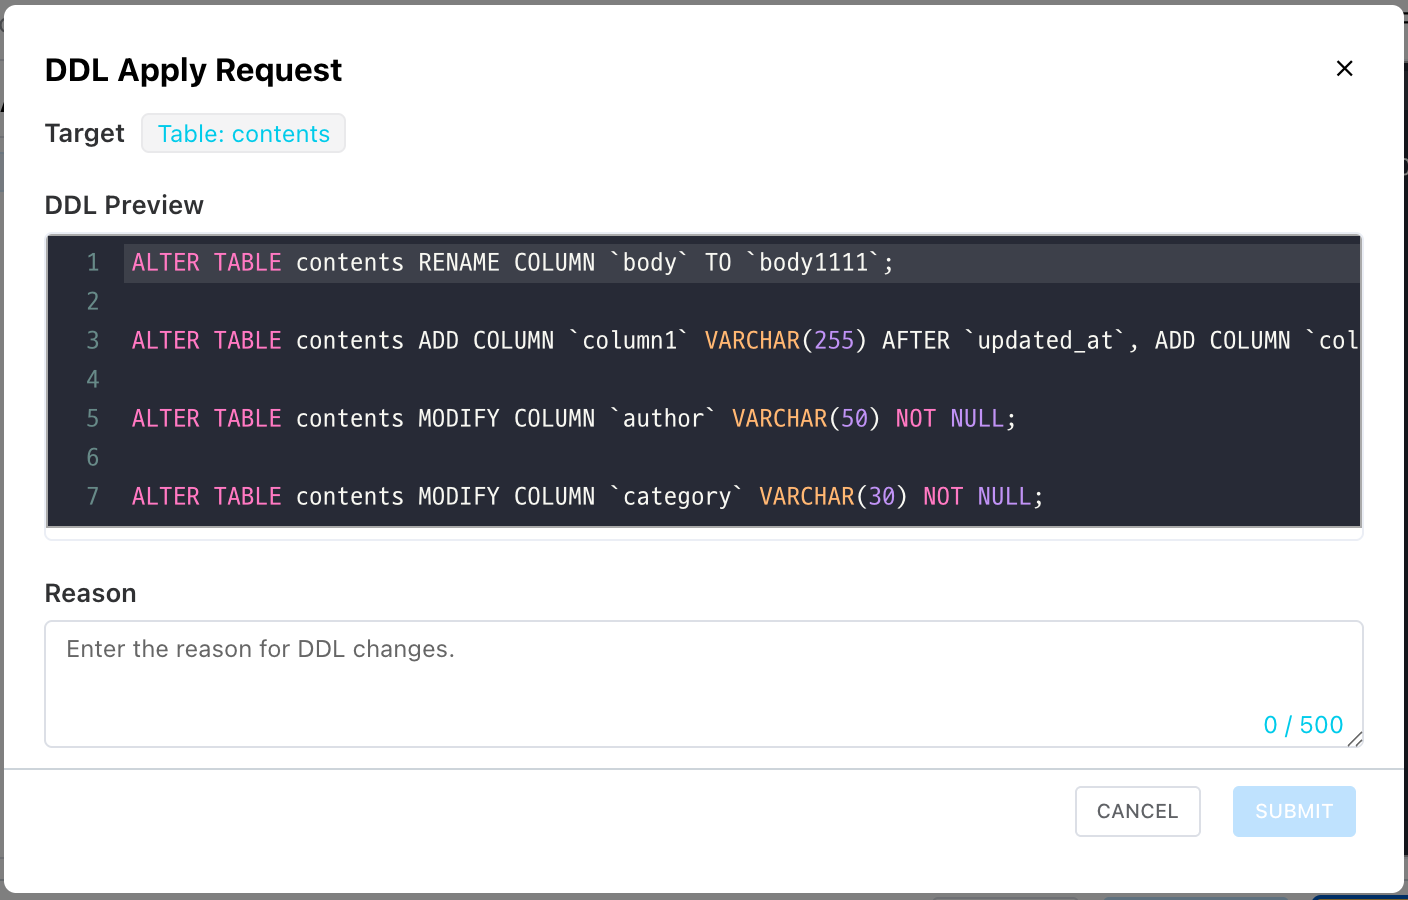
Submit Request
Click "Submit" to send the request to the approver.
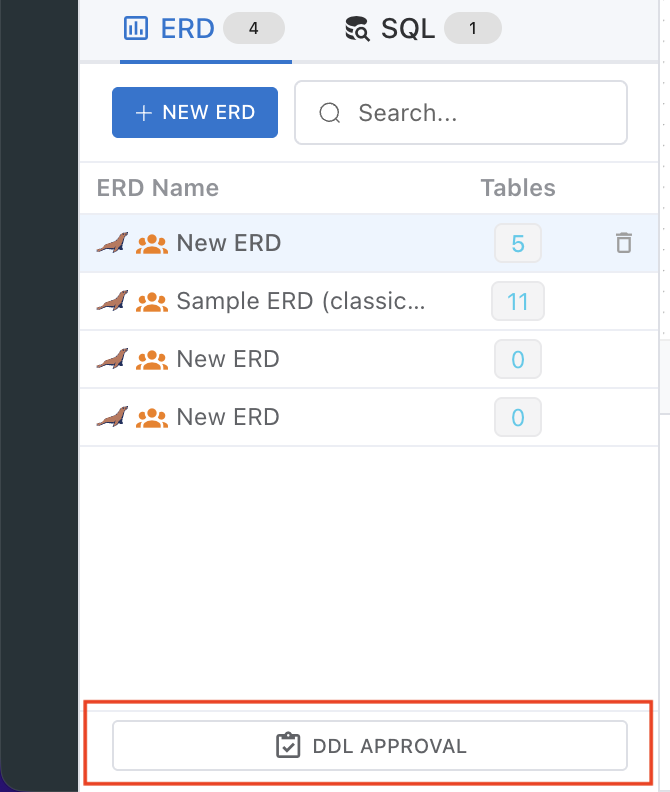
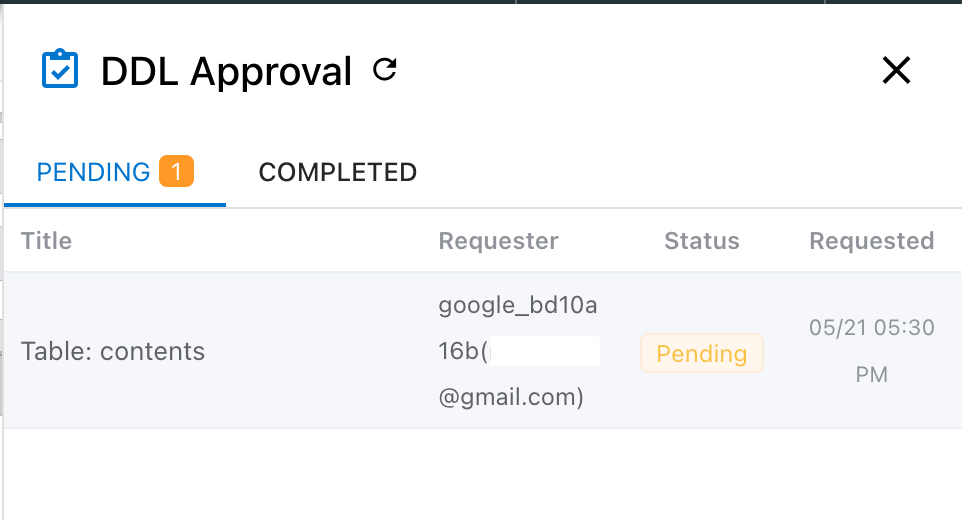
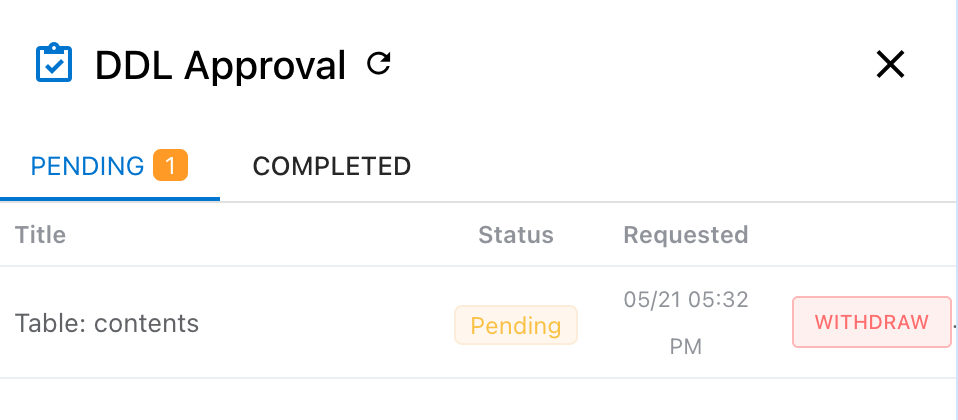
Pending List
Check request status in the DDL Approval Management panel on the right side of the editor.
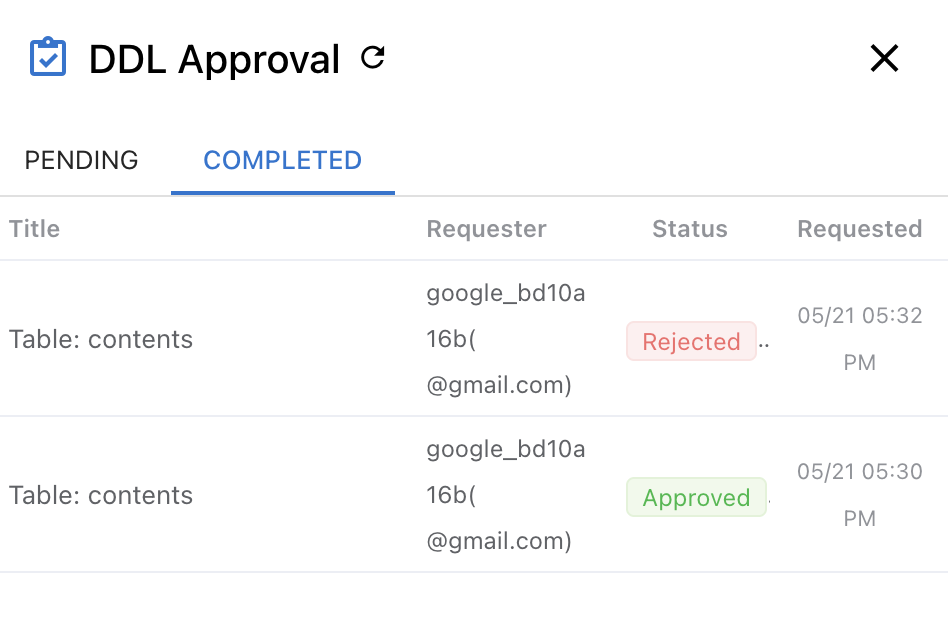
- Pending tab: List of unprocessed requests
- Completed tab: History of approved/rejected/cancelled requests
Requesters can directly withdraw their pending requests.
Approver Review
When an approver clicks a request, a review modal opens.
- Review request info (requester, date/time, ERD, reason).
- Edit the DDL directly (editable before approval).
- Leave a review message.
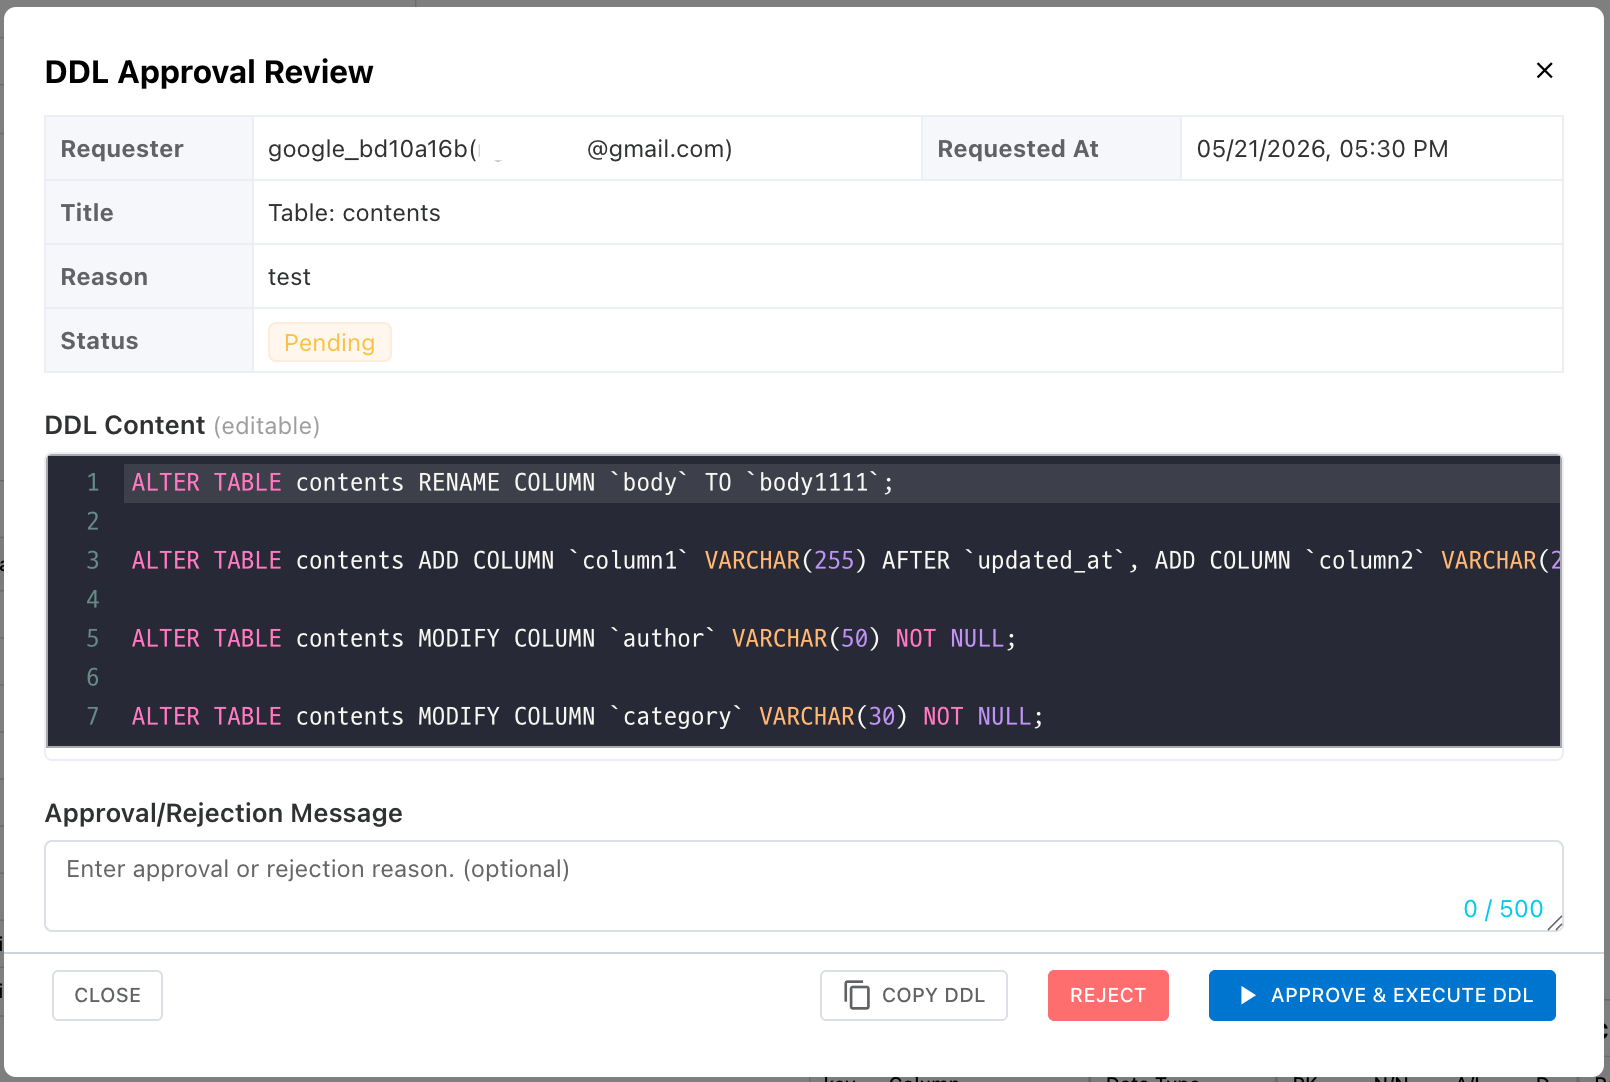
Approve / Reject / History Tracking
| Action | Behavior |
|---|---|
| Approve & Execute | Executes the DDL on the DB immediately, then changes the request status to approved. If DDL execution fails, the request is not approved. |
| Reject | Rejects the request. The rejection reason is sent to the requester. |
| Copy DDL | Copies the DDL content to the clipboard. |
Processed requests can be reviewed in the "Completed" tab, showing the approver, processing date/time, executed queries, and messages.
Note: ERDs with pending DDL approval requests cannot be deleted.